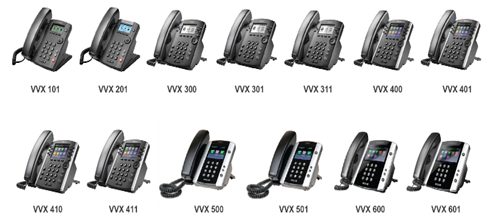
Applicable to Polycom VVX 101, 201, 300, 301, 311, 400, 401, 410, 411, 500, 501, 600, 601
Follow the steps below to return your VVX device to its factory settings. You must have the admin password for the telephone you are resetting for this procedure. If you do not have the password, please open a ticket and your password will be provided immediately.
If you changed the password and no longer have it, please see “Factory Resetting Your Polycom VVX Telephone Without the Admin Password”.
Resetting the phone from the keypad
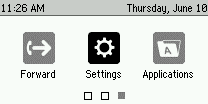
Press the Home/Menu Key
Scroll right to Settings and select
Press 2 or scroll down to Advanced and press select
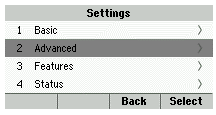
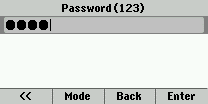
Enter your telephones password
Entering Passwords
When entering passwords on a Poly telephone you will notice it is not as easy as it should be! When prompted for the password you will notice a softkey labeled Mode. By default, the setting is set to numbers so anytime you press a key only numbers will be displayed
When pressed the Mode button will display a section of options which allow you to choose between entering letters or numbers, for the password. To switch from entering numbers to letters, press the Mode button
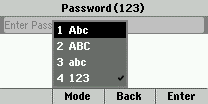
You will be presented with a list of options 1-4. You can select the option by pressing the corresponding number or scrolling up and down and pressing the select button in the middle of the arrows
Options
- Abc: Allows you to enter the first character as uppercase and the rest as lowercase. Also includes number and special characters.
- ABC: Allows you to enter uppercase letters, numbers, and special characters.
- abc: Allows you to enter lower case letters, numbers, and special characters.
- 123: Allows you to enter numbers only
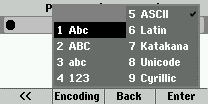
Once you select using the Mode button, the option will then change to Encoding. To switch to a different option press Encoding, then select.
**** Special Characters*****
If your password contains special characters switch to using Abc by selecting Mode and pressing 1. This will allow you to access any special characters. Special characters can be accessed by pressing the following option below until you arrive at the character you want to use.
Example: to select the @ symbol press the number one, 6 times
Options
- Press 1 to select the following. ! | ‘ ^ \ @ : 1
- Press * to select the following. . * – & % + ; ( )
- Press 0 to select the following. [blank space] / , _ $ ˝ = ? 0
- Press # to select the following. # > < { } [ ] “ `
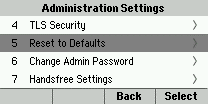
Press 1 or select Administration Settings.
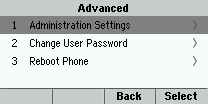
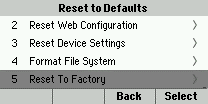
Press 5 or select Reset to Defaults
Press 5 again or select Reset to Factory
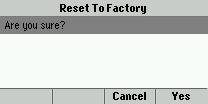
Select Yes when it asks, “Are you sure?”
The telephone will reboot and reset itself back to factory. If you are using auto provisioning from Fireline, once the telephone resets it will reach out to the provisioning server and check if there are any firmware updates it needs. After Firmware verification your phone will connect and download your configuration. This process may take 5-10 minutes depending on the firmware level of the telephone at the time of reset. The phone will reboot multiple times during this process. Once complete your telephone should return back to its auto provisioned configuration.
Resetting the Telephone via Web
This procedure can be done with Microsoft Edge or Google Chrome. The procedure is shown in the Edge browser.
Getting the IP Address of the Telephone
Press the Home or Menu Key
Select Settings
Select Status
Select Network Configuration
Write down the IPV4 Address of the telephone
Accessing the Phone via the Web
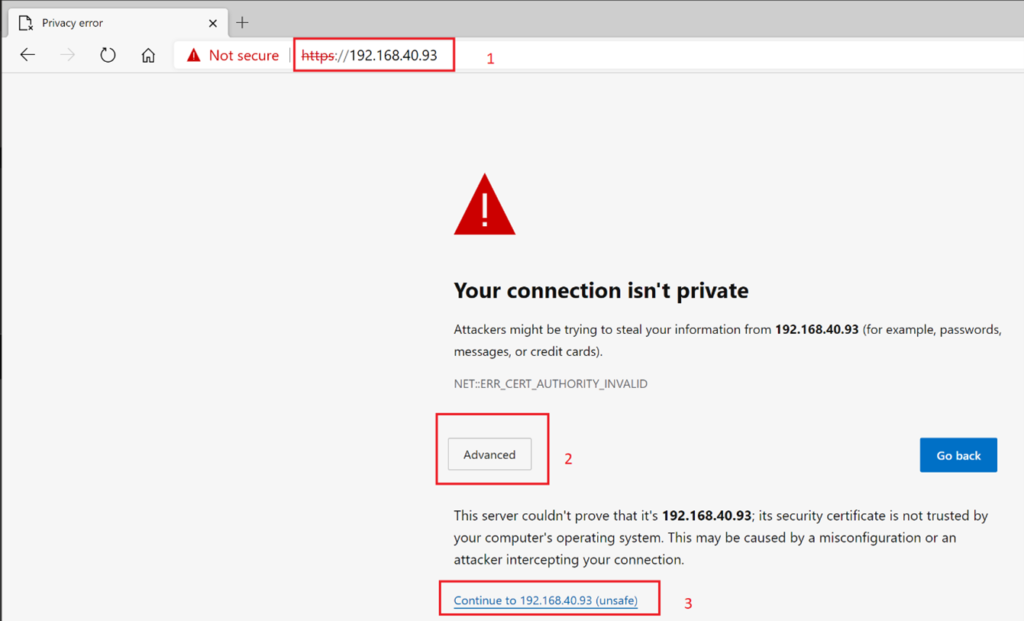
- Enter the IP address you recorded from the telephone into the address bar in the form of https://xxx.xxx.xxx.xxx and press enter.
2. Select Advanced at the “Your connection is not private” page.
3. Select “Continue to xxx.xxx.xxx.xxx (unsafe)”
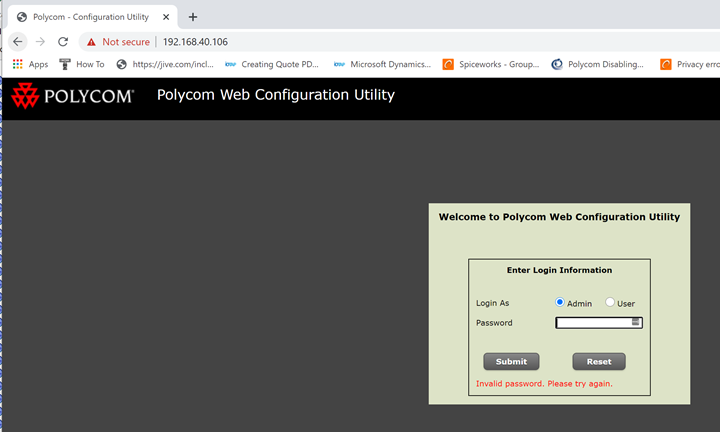
From the login page enter the username and password for the telephone.
User Name: admin
Password:
If you do not know the password of your telephone, please open a ticket and your password will be provided immediately.
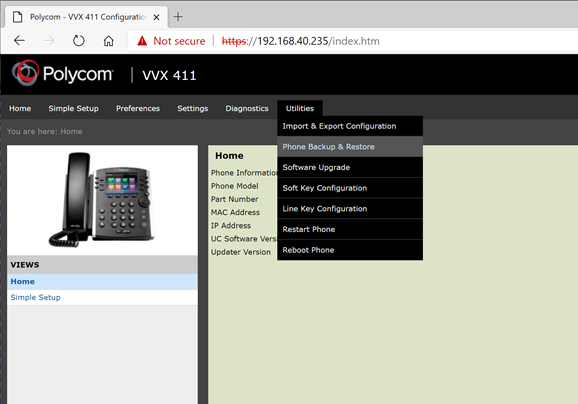
Once logged in move your mouse over Utilities and select Phone Backup and Restore
Click on the + symbol next to Global Settings.
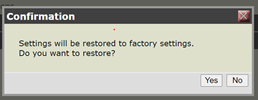
Click Restore
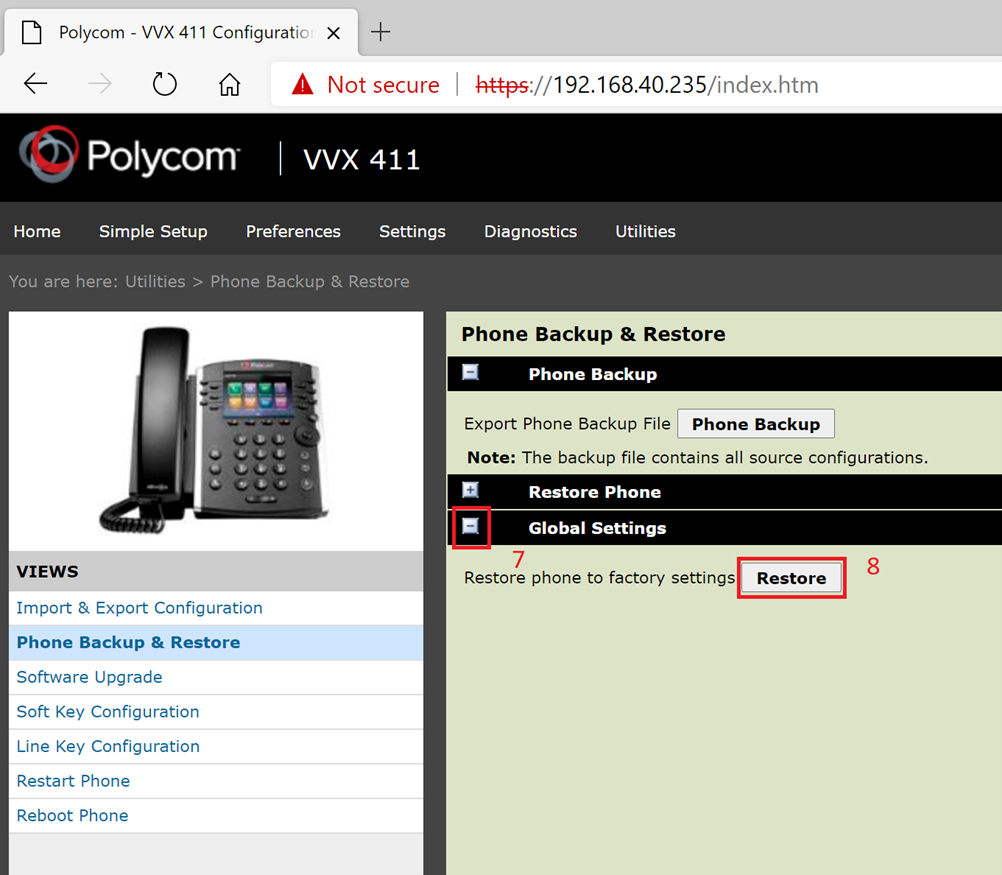
Click Yes to the Confirmation Message Pop Up.
The telephone will reboot and reset. Once reset the telephone will reach out to the provisioning server and update the phones firmware if needed. After Firmware verification your phone will reach out and download your configuration. This process may take 5-10 minutes depending on the firmware level of the telephone and may reboot several times.
Version 03.06092021