Single Sign On (SSO) for Business and Contact Center Systems
Single Sign-On (SSO) is a feature that allows users to access multiple applications or websites with just one set of login credentials. It simplifies the authentication process, reduces the need to manage multiple usernames and passwords, and improves user experience by eliminating the need to log in repeatedly.
For SSO to work your PBX system must be able to access https://login.microsoftonline.com .
Microsoft Entra Setup
To setup an OAuth 2.0 client with Microsoft you must first register the application in the Microsoft Entra Admin Center
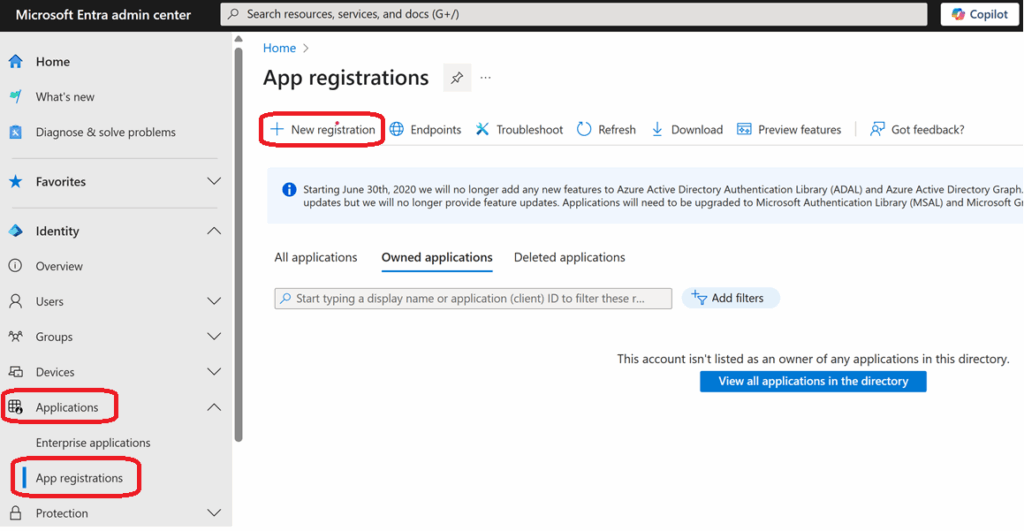
- Select Applications
- App registrations
- Click New Registration
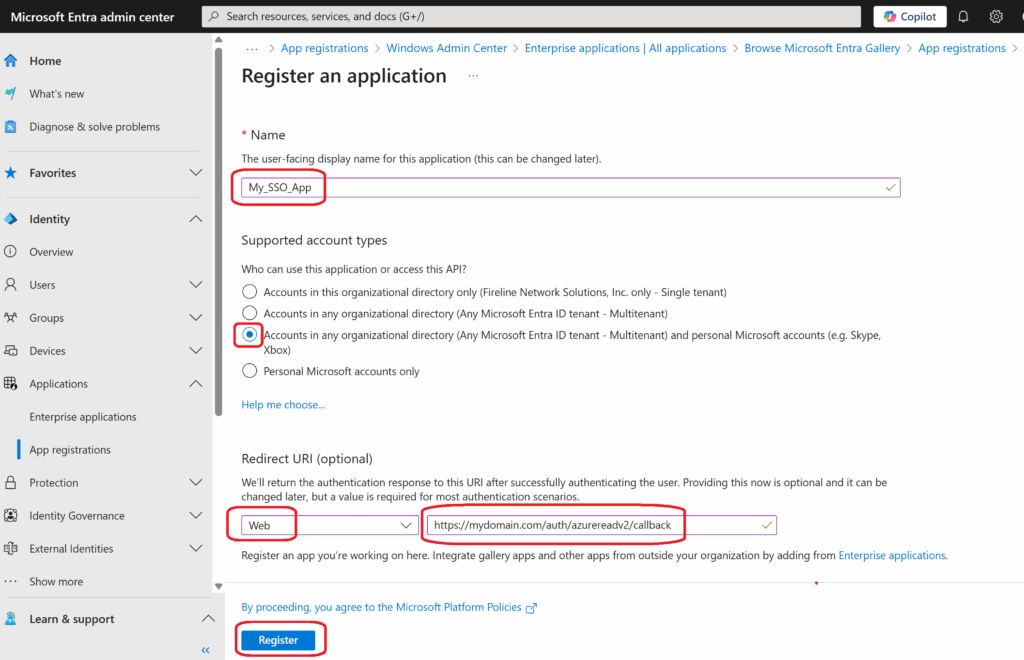
- Name: Enter a name for the Application
- Supported account types: Select Accounting in any organizational directory (any Microsoft Entra ID tenant – Multitenant) and personal Microsoft accounts (r.g. Skype, Xbox)
- Redirect URI: Web https://pbx_domain_name/auth/azurereadv2/callback
- Click Register
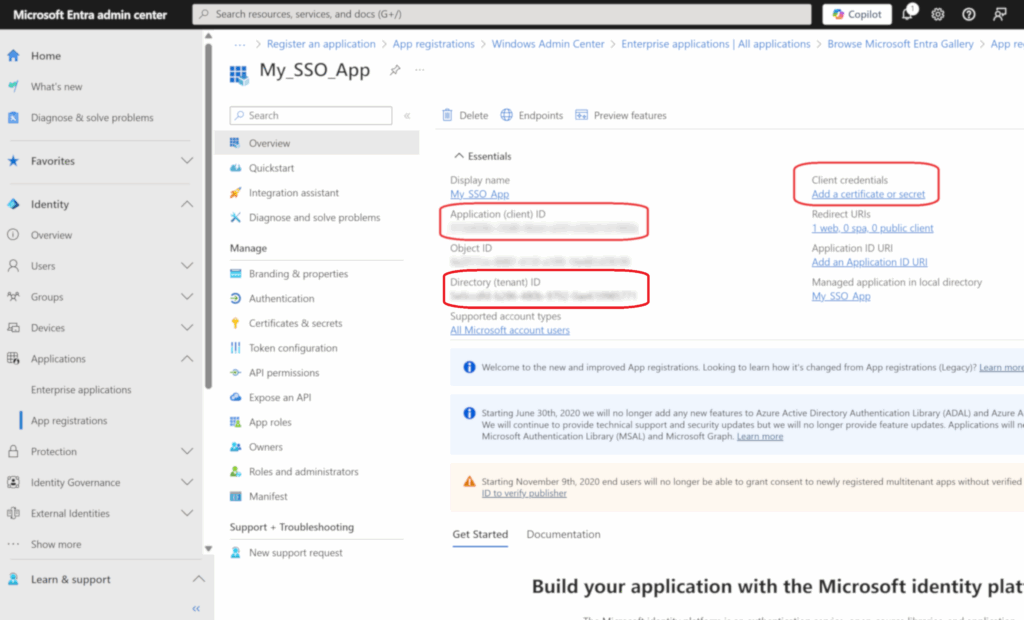
- Copy the Application ID to a safe location, this will be needed later.
- Copy the Directory (tenant) ID to a safe location. This is an optional field and can be used to restrict SSO access to members of this tenant only.
- Under Client credentials, click Add a certificate or secret.
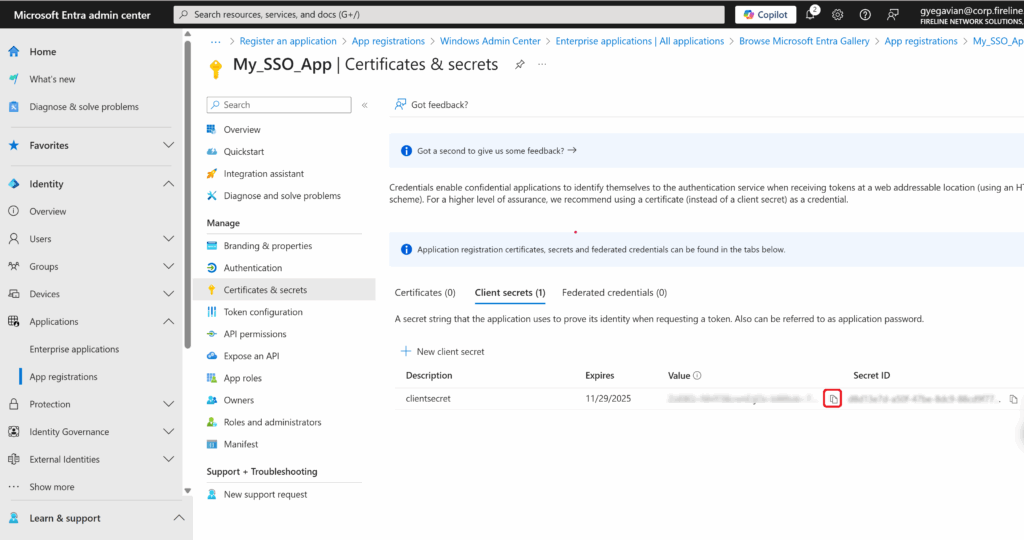
- Copy the Value from the Client secret and save it with the Application ID.
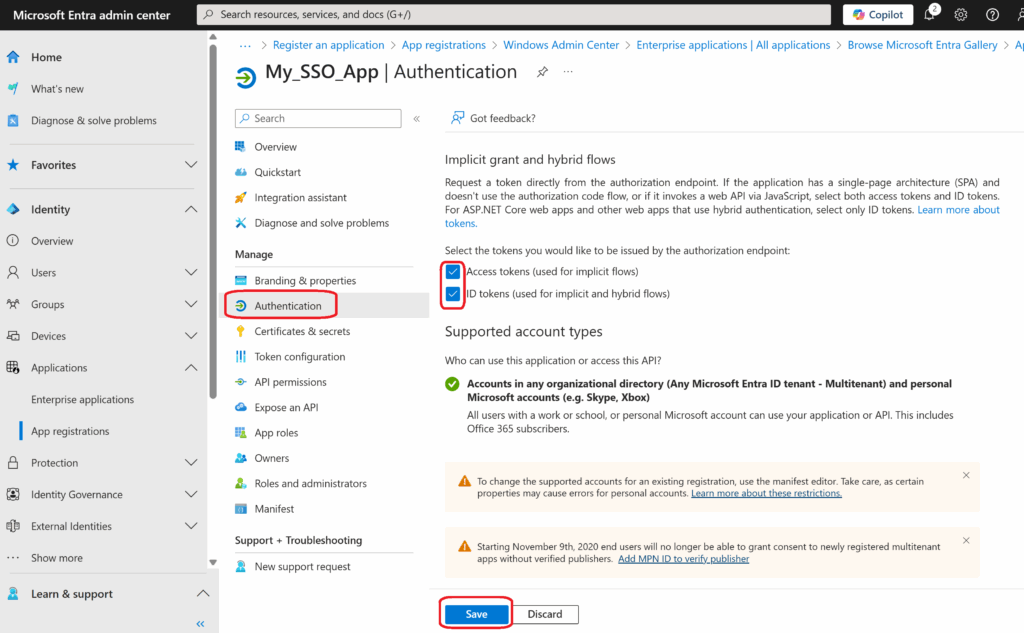
- Select Authentication Menu Item
- Place a check mark in both Access tokens (used for implicit flows) & ID tokens (used for implicit and hybrid fows)
- Click Save
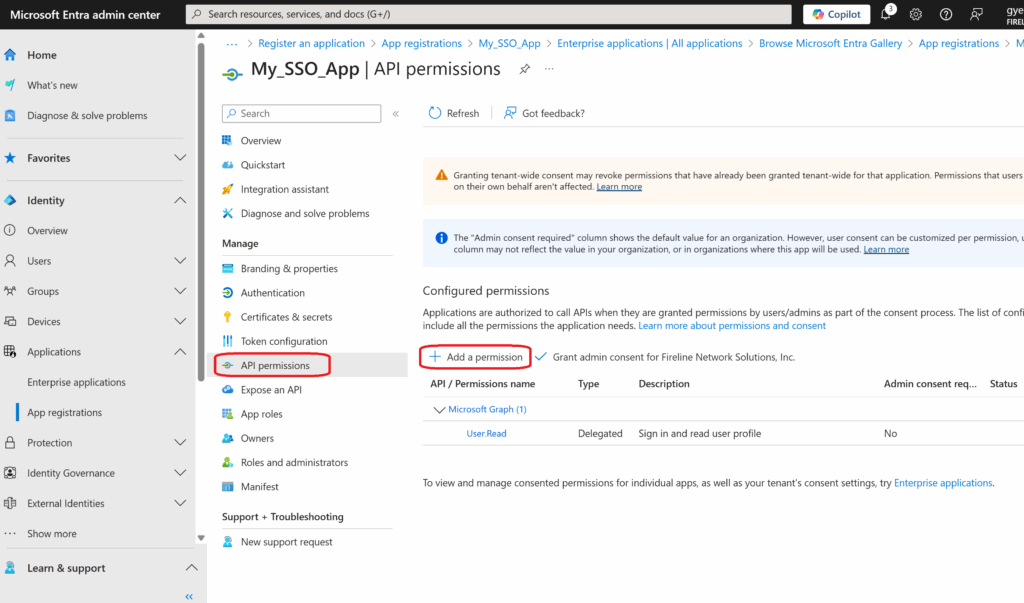
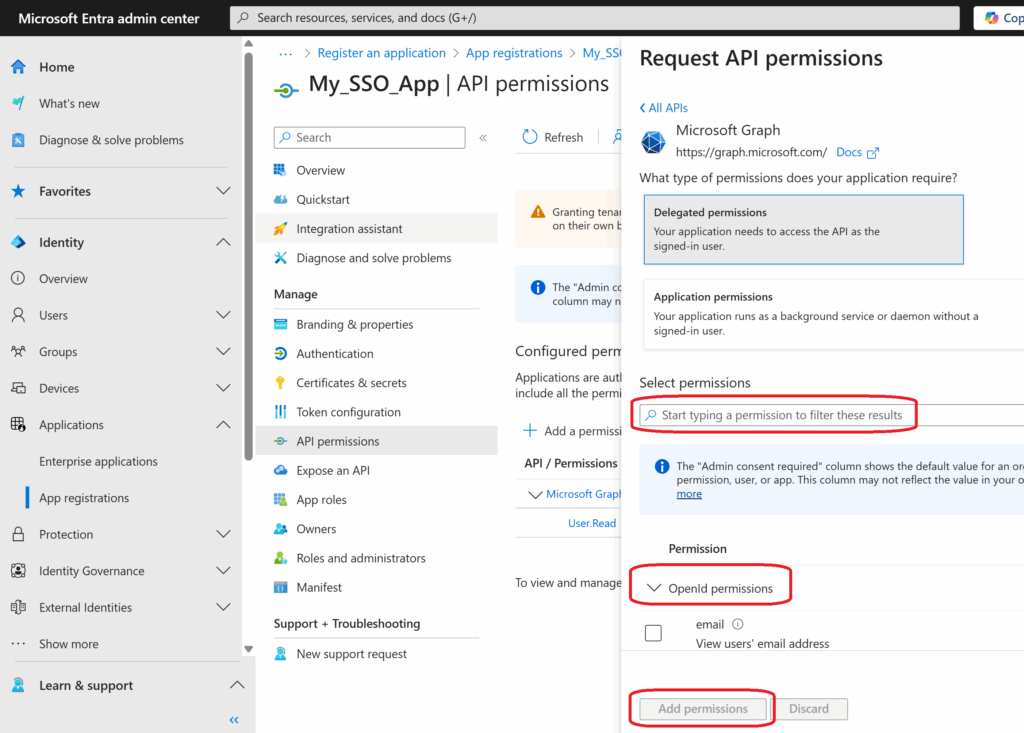
- Select API permissions
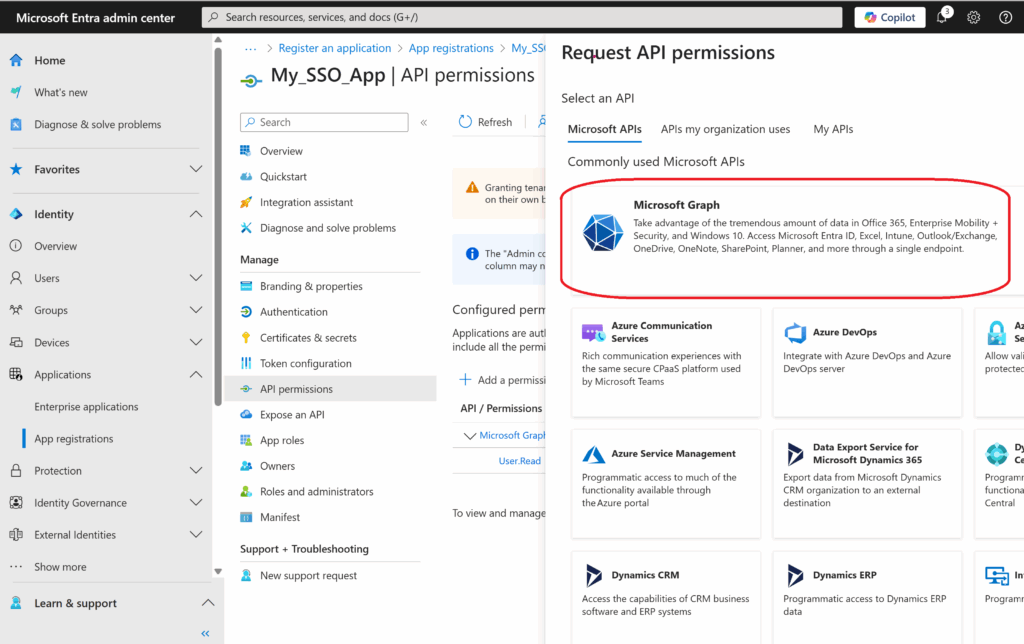
- Click Add a permission
- Under Request API permissions select Microsoft Graph
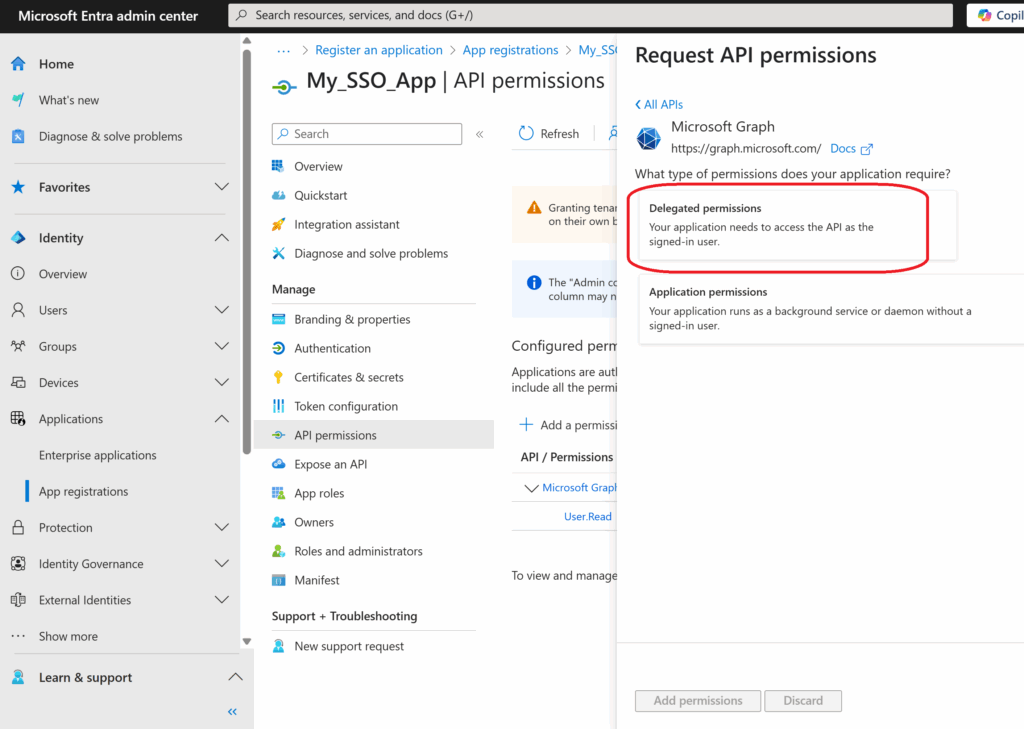
- Select Delegated permissions
- Under Select Permissions type o to pull up the OpenID permissions
- Expand OpenID and select the following
- offline_access
- openid
- profile
- Once selected click add permissions
- Review all items are listed under Microsoft Graph including User.Read which should have been selected by default.
- Click on Grant admin consent
- Click Yes to the Grant admin consent confirmation, pop up.

PBX Setup
- to your PBX system
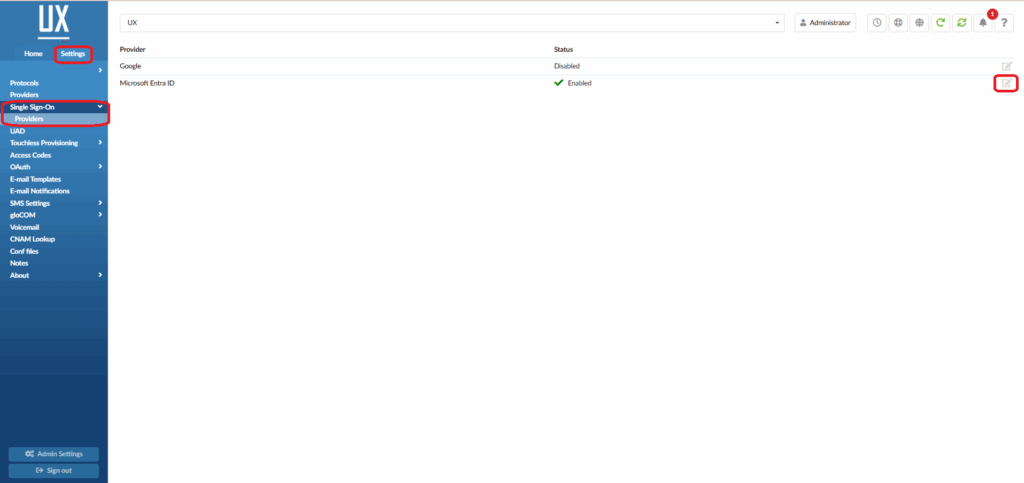
- Select the Settings tab
- Select Sigle Sign On
- Select the Edit button to the right of the Microsoft Entra ID option
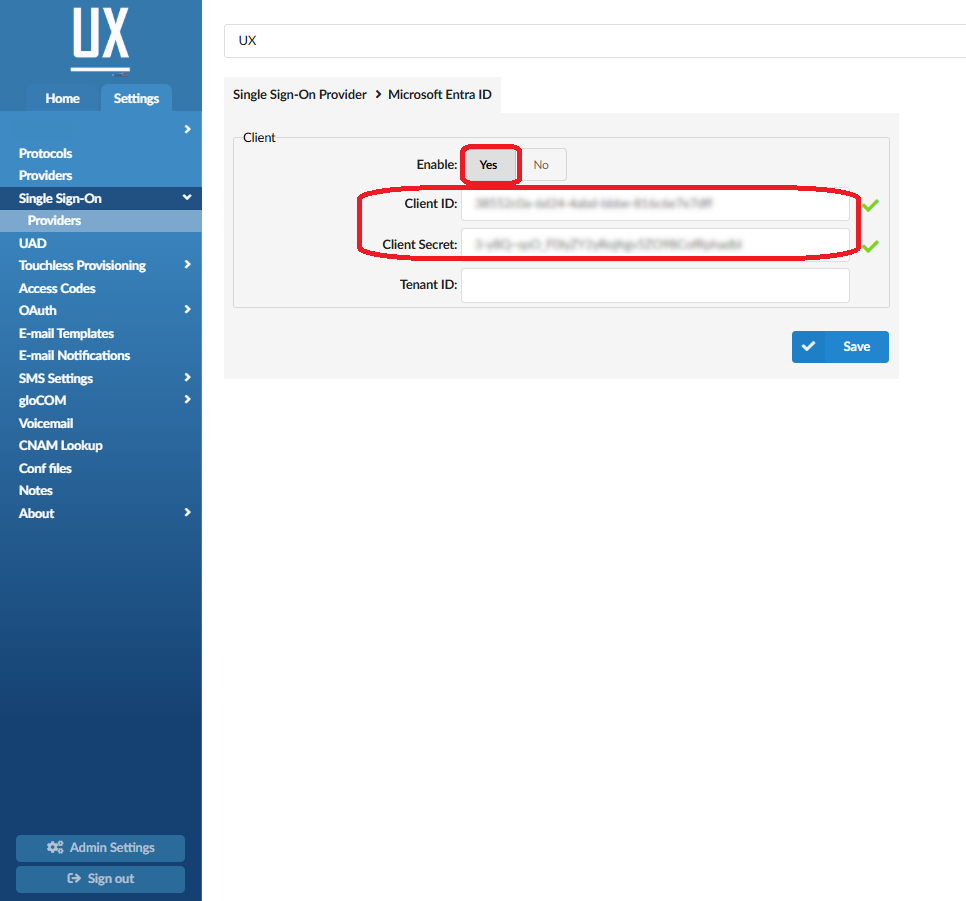
- Select Yes to enable the Entra Client
- Copy the Application ID you saved earlier, and paste it into the Client ID field
- Copy the Value of the Client Secret saved earlier, and paste it into the Client Secret field.
- The Tenant ID can be left empty, allowing users from any Microsoft Entra ID tenant to authenticate or populated to restrict to single Micrososft tenant only.
- Save
- Select Servers
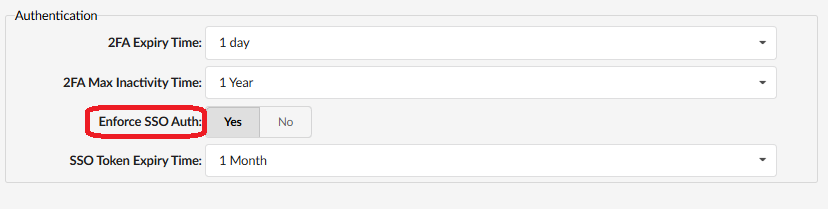
- Move to the Autehntication section and select Yes to Enforce SSO Auth, accross the system. Select No if you want to manage SSO per extension.
- Select the number of months, (1-3), that you would like the SSO token to expire.
- Select Save
Per Extension Settings
- From the Home tab open Extensions
- Chose the extension you would like to enforce SSO on.
- Go to Autentication section and select Yes to SSO Enabled.
- Save extension.
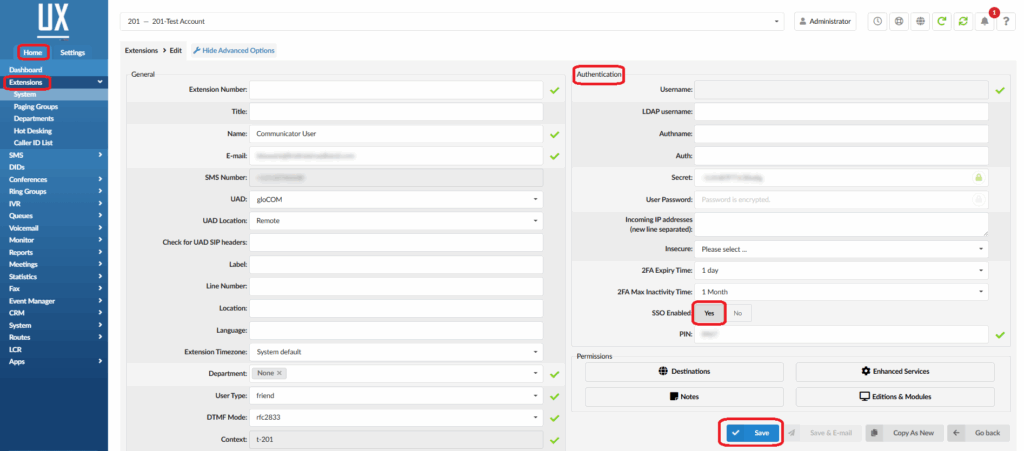
- SSO will be enforced for this specific extension only.