Archiving your Phone Data
Archiving is a feature which allows you to move your Recordings, Voicemail, Fax and CLIR (Calling Line Identification Record) Reports to a separate location to store them for longer periods of time. This can be useful when falling under a legal or compliance requirement or you just like having a copy of all your phone data. There are currently 5 options for storing your data.
- Amazon S3
- FTP
- SFTP
Files are stores with the following structure ‘/resource/year/month/day/hour/filename’
Example: /Voicemail/2021/11/16/file.mp3
Setting up the Archive Feature
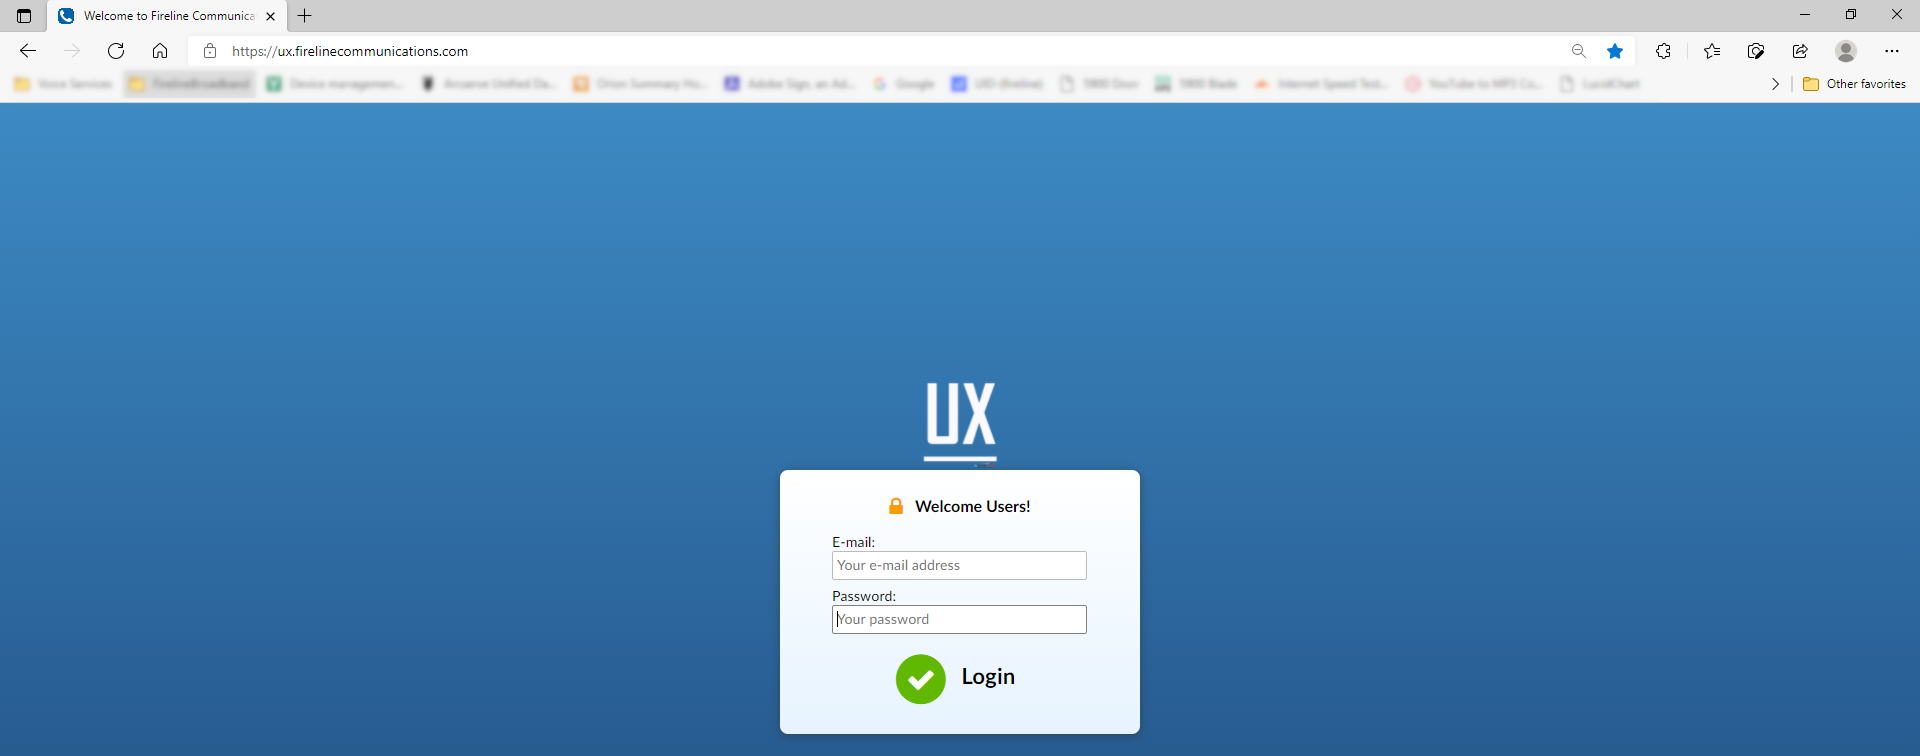
- Using your browser go to https://ux.firelinecommunications.com
- Login using the email and password associated with the extension you would like to access.
.
- Using the Menu go to Settings > Archiving.
.
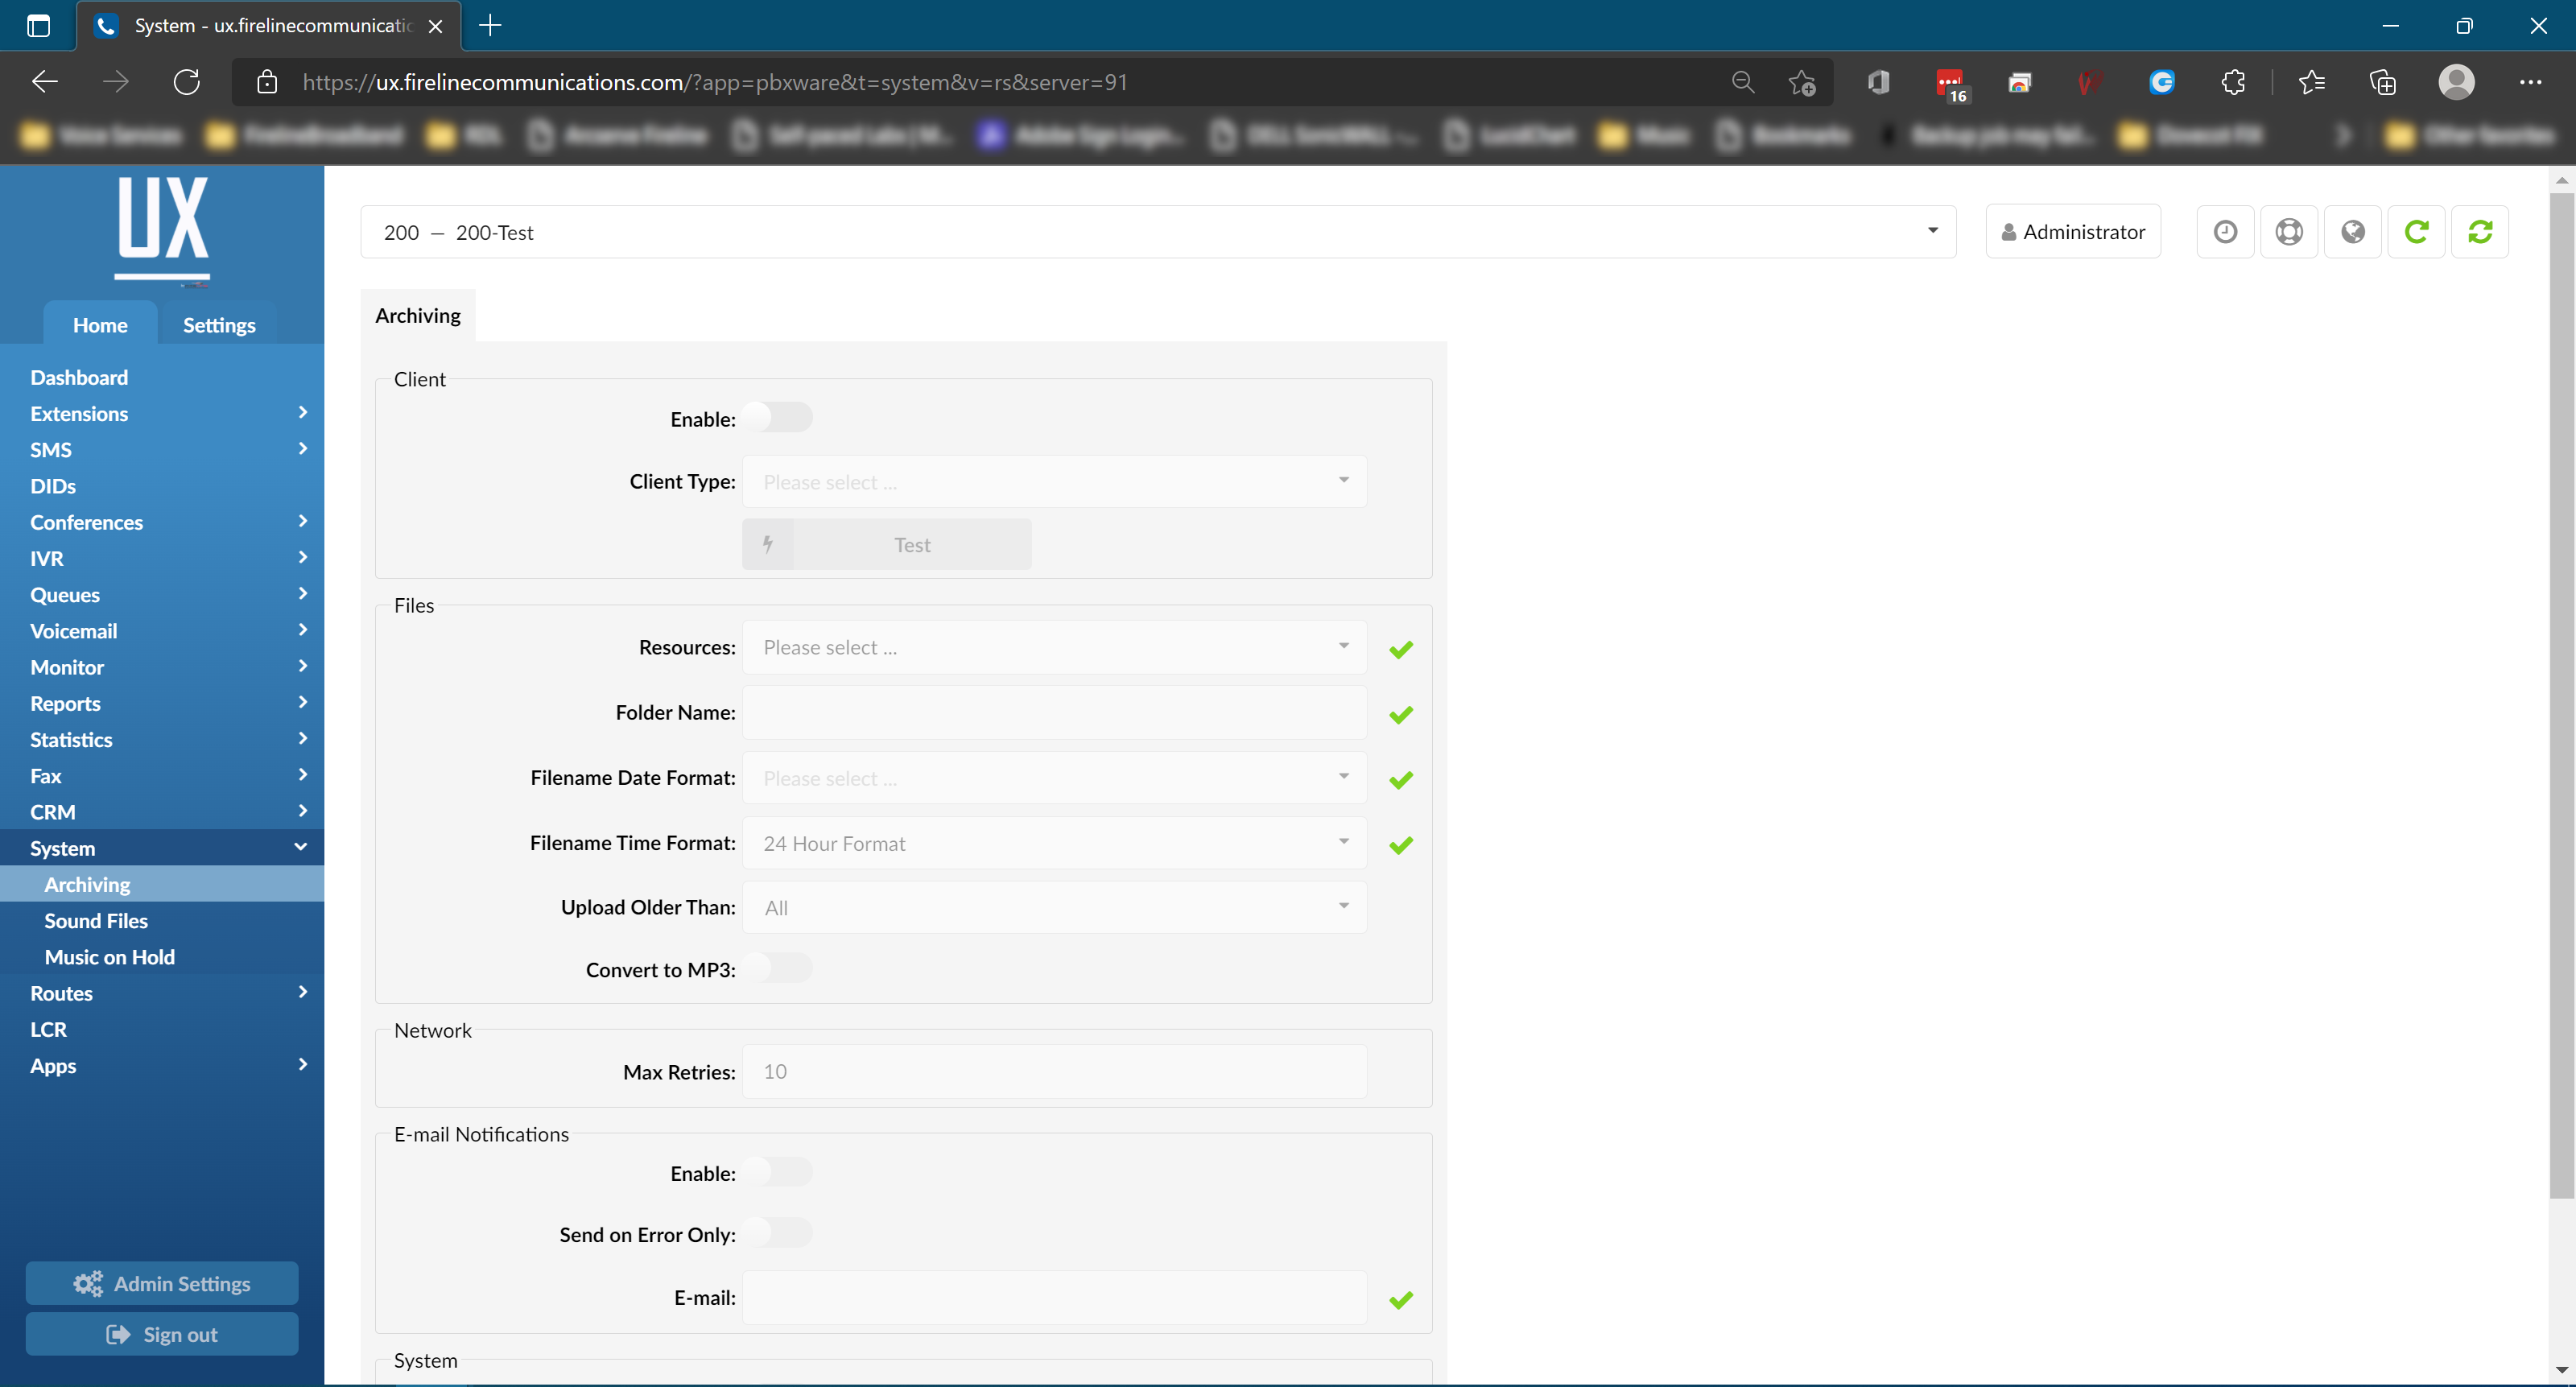
- Select Enable to start Archiving.
- Client
a. Amazon S3
i. When selected you will need to provide the following information for Amazon
1. Access Key
2. Access Secret
3. Bucket
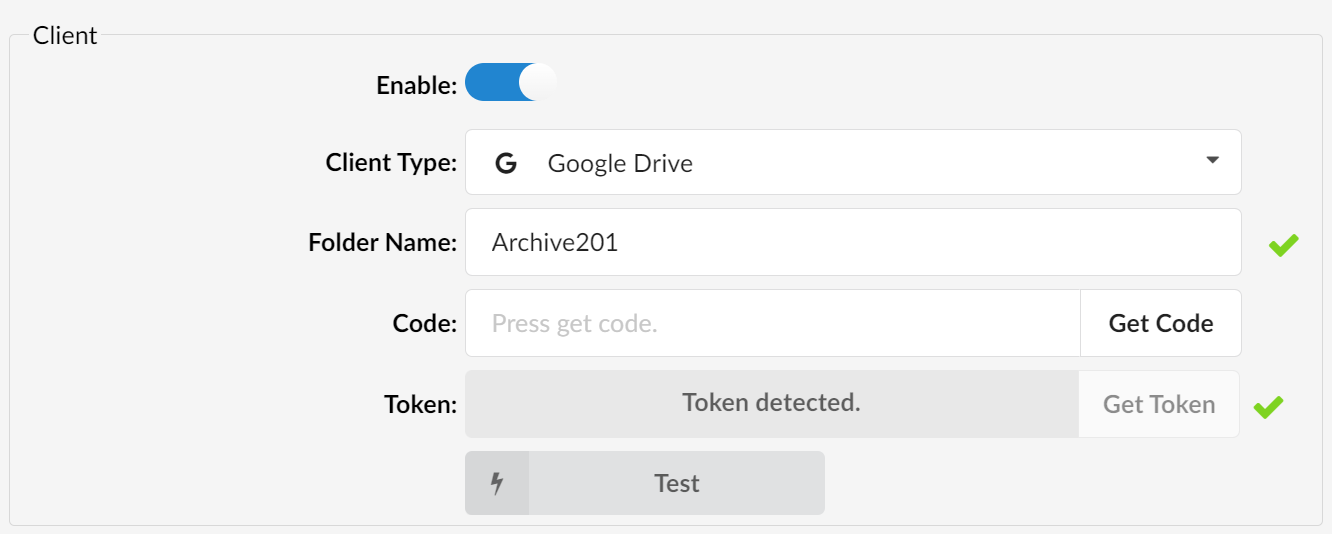
b. Google Drive - Select the Client type where you are going to send the files.
- Amazon S3
.
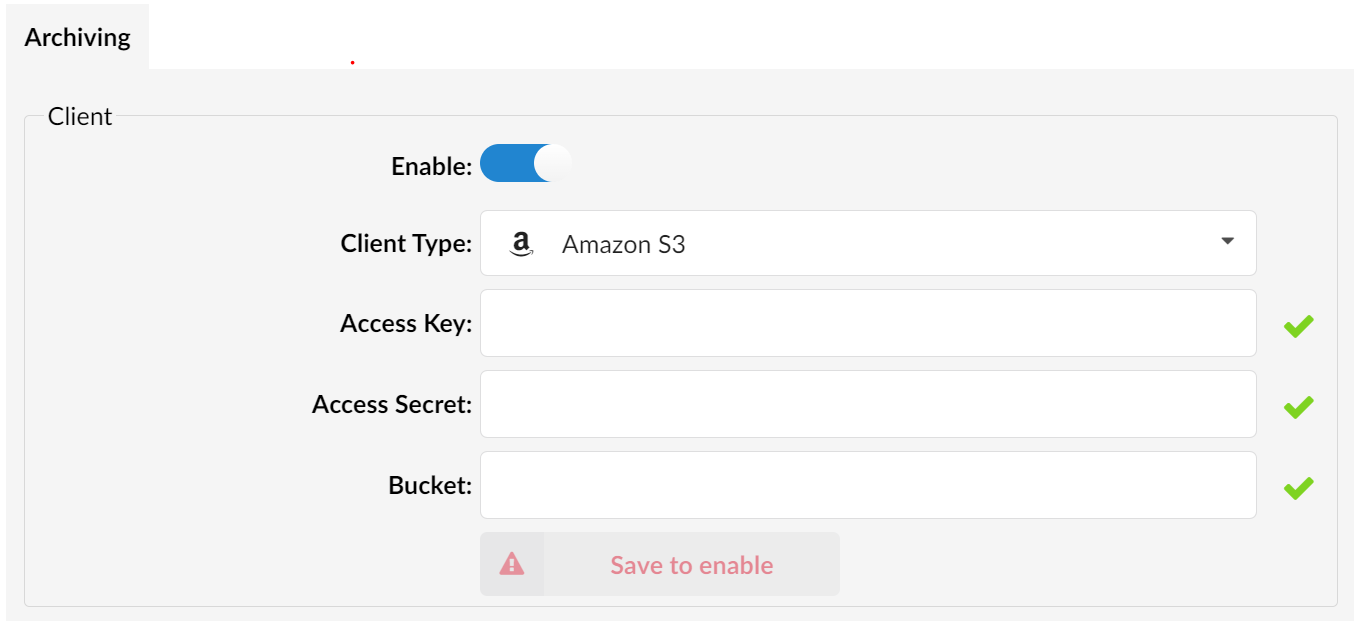
- Access Key: Enter the access key provided by Amazon
- Access Secret: Enter the Access Secret provided by Amazon
- Bucket: Enter the bucket provided by Amazon
- Google Drive
.
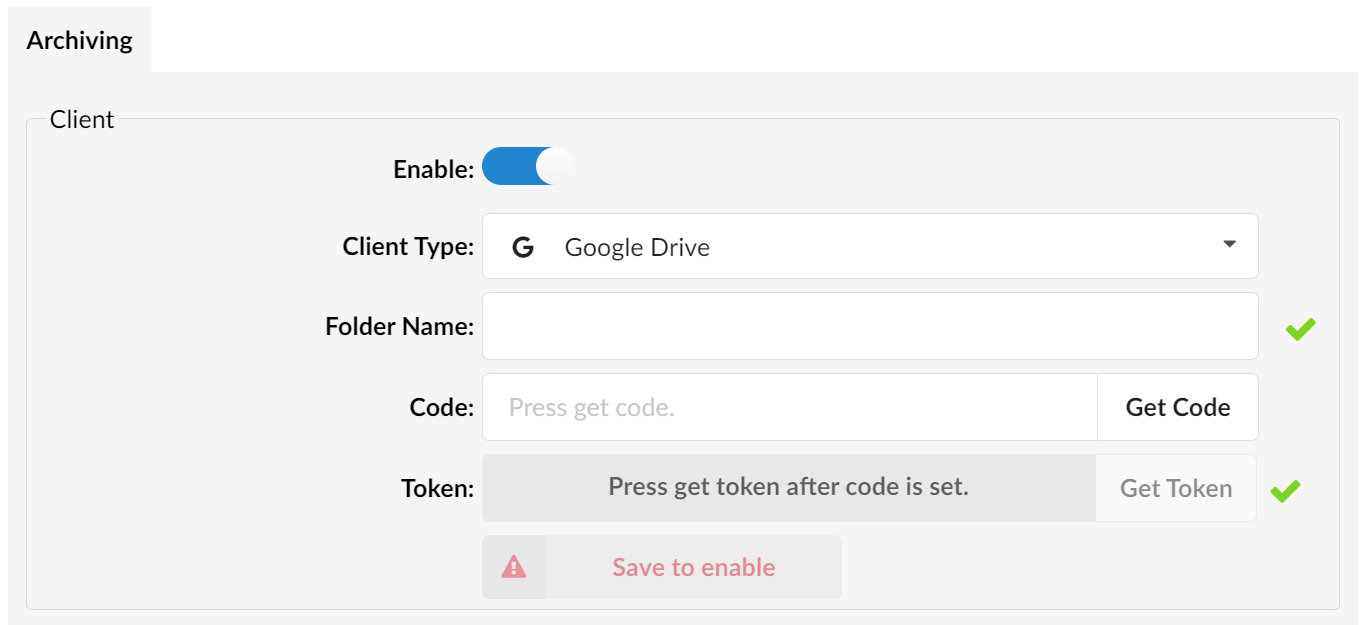
- Folder Name: Enter the name of the folder you want to store the files in. This folder will be created automatically on your Google Drive as part of the process.
- Code: Click the Get Code button
- You will be presented with a pop up window to Allow access.
.
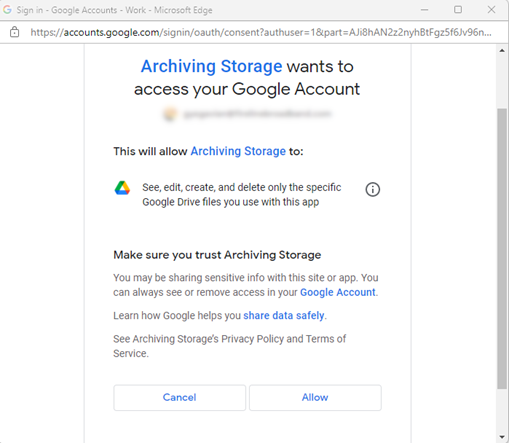
- Select Allow
- Next you will be presented with the code
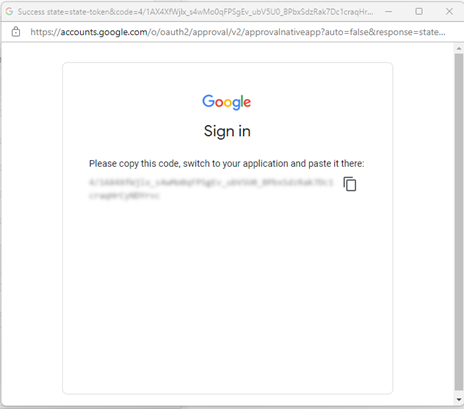
- Copy the code and paste it into the Code section on the Archiving setup page.
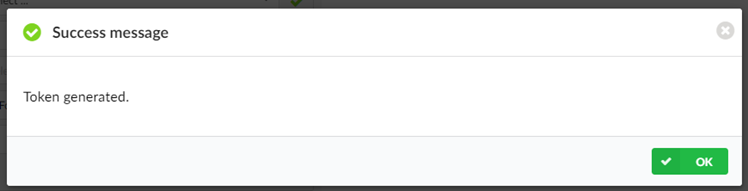
- Next click the Get Token button. A token will be generated. Click Ok to accept.
.
- Continue to the Files section of the form.
- You will be presented with a pop up window to Allow access.
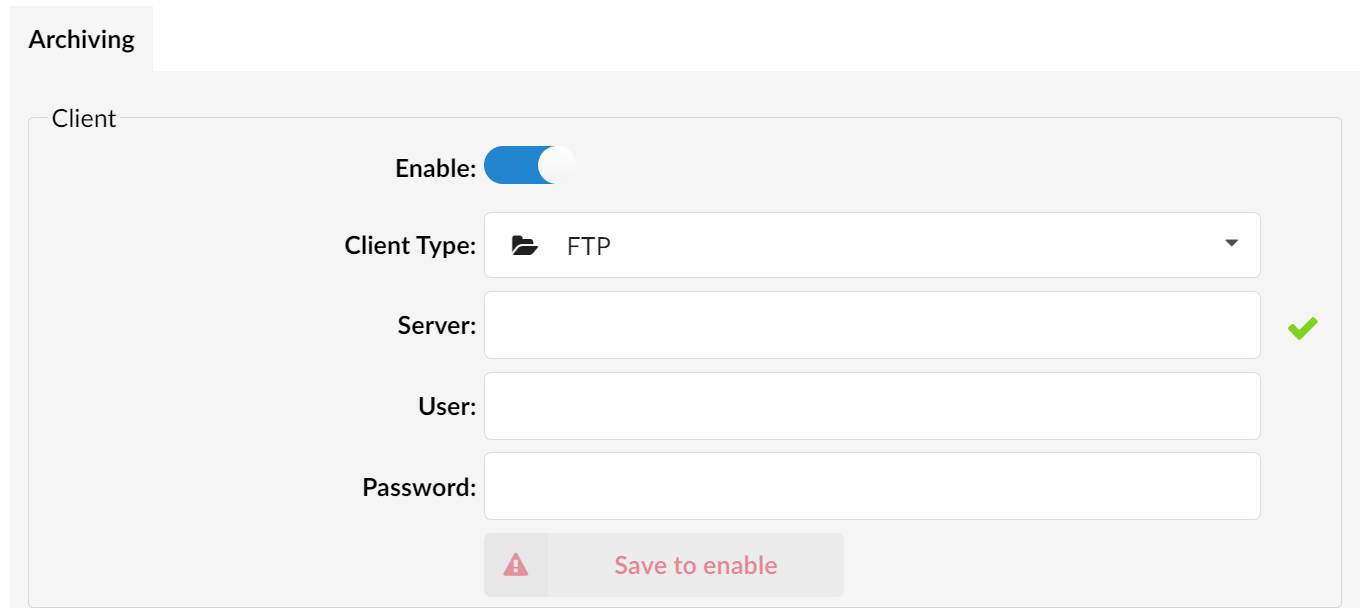
- FTP

- Server: Enter the hostname or IP address of the FTP server.
- User: Enter the username
- Password: Enter the password of the ftp server.
- Continue to the Files section of the form.
- SFTP
.
- Server: Enter the hostname or ip address of the SFTP server.
- User: Enter the username of the server.
- Password: Enter the password for the server.
- Continue to the Files section of the form.
- Amazon S3
- Files
.
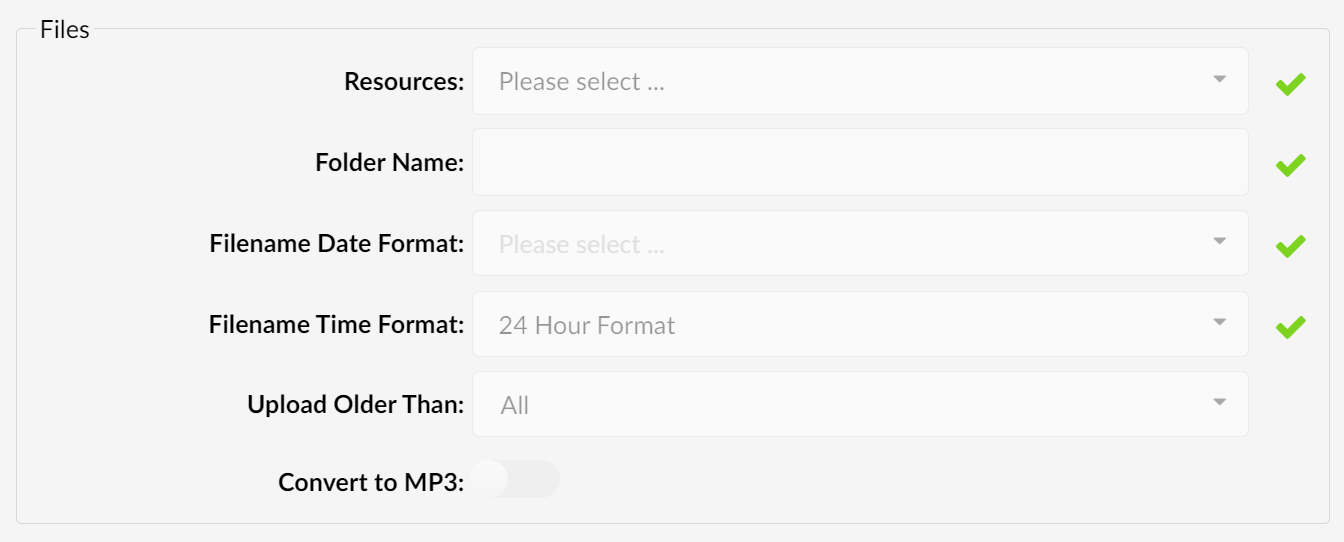
- Select the Resources you wish to store in the Archive
- Recordings
- Voicemail
- Fax
- CLIR Records (Call Records)
- Folder Name: Enter a Folder Name for the files to be stored on Google
- Filename Date Format: Select the format in which the date should be displayed in
- Fireline Time Format
- 24 Hour Format
- 12 Hour Format (AM/PM)
- Upload Older Than: Select when you want to upload the files. (We suggest setting this to 1-2 months)
- Convert to MP3: Enable this feature to store the audio files in MP3 format rather than WAV.
- Select the Resources you wish to store in the Archive
- Network
.

- Max Retries: Set the number of times you want to keep trying in the event of an error uploading the files. (We suggest setting this to 5)
- E-mail Notifications
.
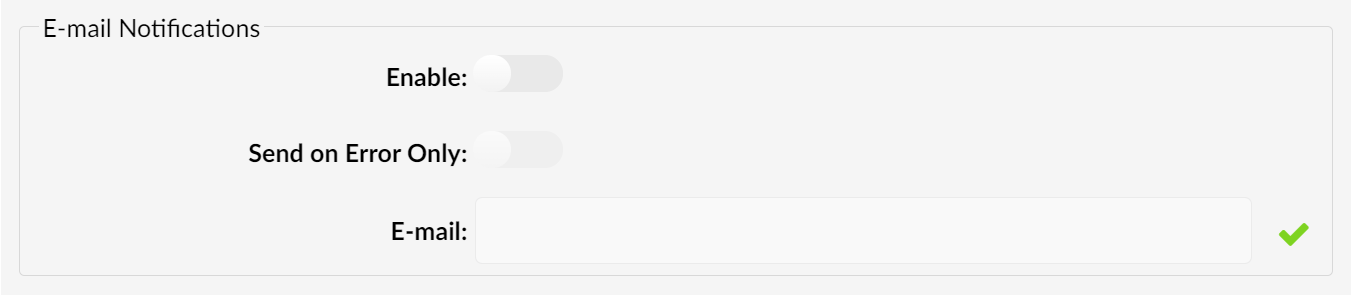
- Enable: Select to enable email notifications
- Send on Error Only: Select if you want to receive notifications only when there is a failure.
- Email: Enter the email address you would like to send the notifications to. If you want to send to multiple people, create a distribution group on your email system and add the users into it. Add the distribution group email and your email system will distribute to individual users
- Click Save
- Once saved go back to the top of the form and select test to make sure your setup is correct.
.
- Once testing is successful, archiving will be run on schedule every morning at 12:00 a.m.
Version 01.11162021